How to Connect to a Linux Server via SSH from Windows (Using PuTTY)
In this guide, we’ll walk you through step by step how to access your Linux server from a Windows PC using PuTTY, a free and lightweight SSH client.
✅ Requirements:
- The server IP address.
- The username (usually
root). - The password.
- PuTTY downloaded and installed.
1. Download and Install PuTTY
If you haven’t installed it yet, you can download PuTTY from its official website:
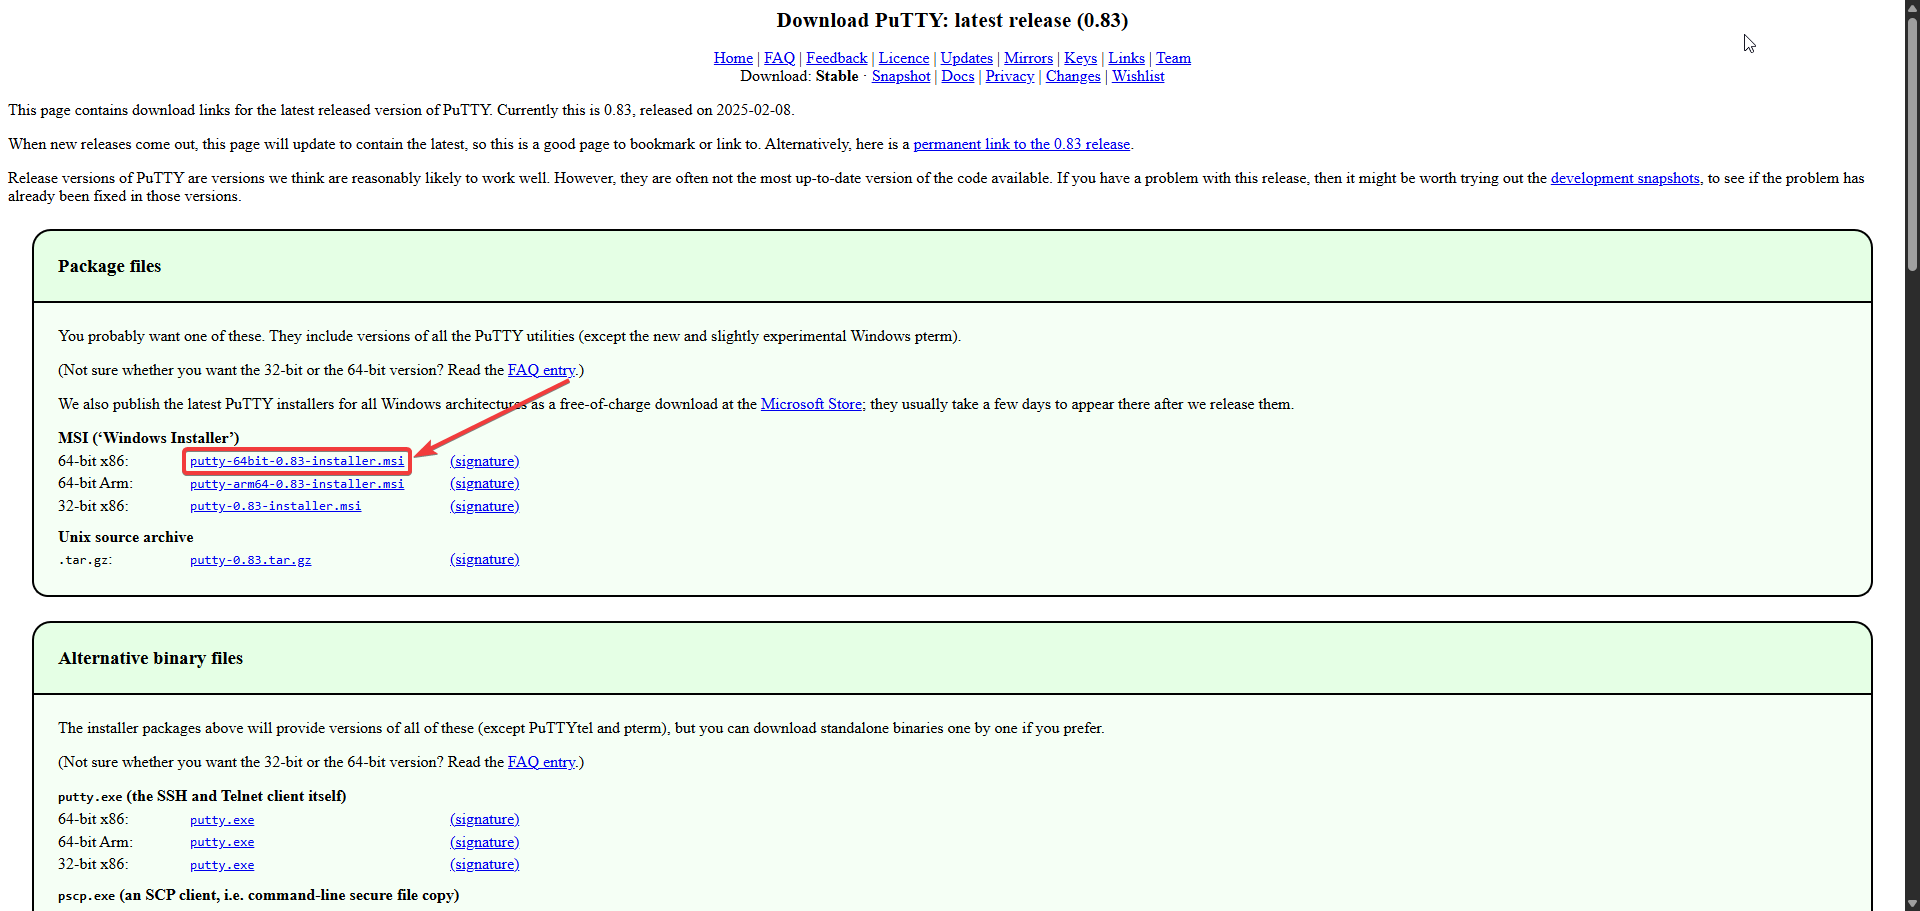 |
| Image 1: Official PuTTY download page. |
Download the version that matches your system (normally “Windows Installer 64-bit”). Then install it like any other program.
2. Open PuTTY
Once installed, open PuTTY from the Windows Start menu by searching for “PuTTY”.
 |
| Image 2: Opening PuTTY from the Start menu. |
3. Configure the SSH Connection
In the Host Name (or IP address) field, enter your server’s IP address (e.g., 23.175.40.51).
Leave the port as 22 (default for SSH), and make sure SSH is selected as the "Connection type".
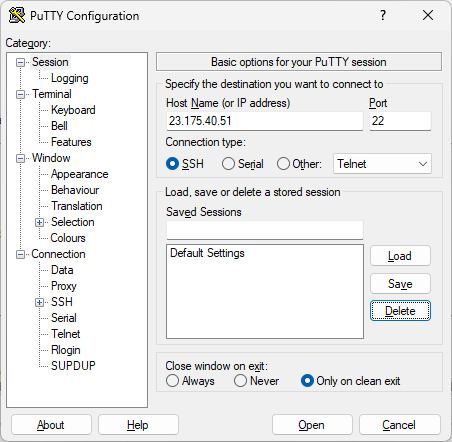 |
| Image 3: Entering IP, port, and SSH protocol. |
Optionally, you can save this configuration with a name (under "Saved Sessions") and click Save to avoid retyping it every time.
4. Connect to the Server
Click Open to start the SSH connection.
The first time you connect, PuTTY will show a security alert asking if you trust the server. Accept it by clicking Yes.
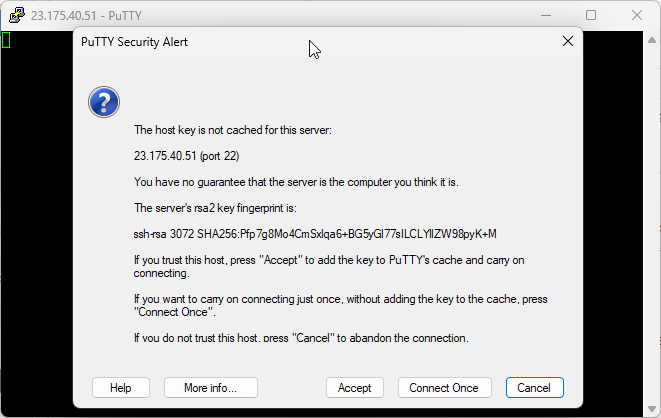 |
| Image 4: Security warning on first-time connection. |
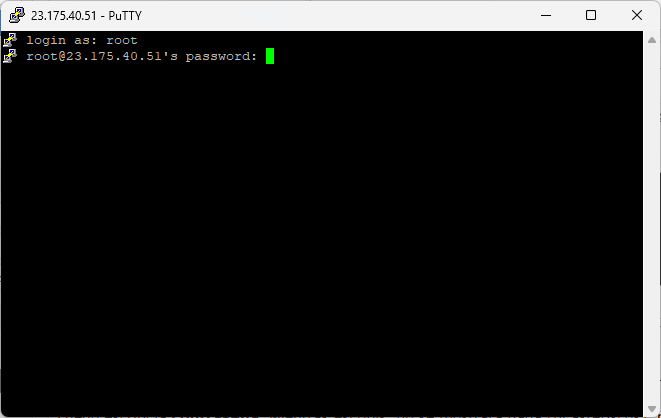
5. Log In
A terminal window will open asking for the username. Type root (or the appropriate user) and press Enter.
Then type your password. Nothing will appear as you type (not even asterisks), but this is normal. Type the full password and press Enter.
 |
| Image 5: Logging in with username and password. |
If your credentials are correct, you’ll access the server and see the Linux console prompt.
 |
| Image 6: Successful SSH connection. |
❌ Common Issues
Access Denied
- Check that the username and password are correct.
Connection Refused
- The server might be turned off or the SSH service is not running.
Host not found
- Check that the IP address is correct and that you have an internet connection.
Connecting from macOS or Linux
On macOS or Linux, you don’t need PuTTY, as both systems come with a built-in SSH client in the terminal.
Steps:
- Open the Terminal application.
- Run the following command, replacing IP with your server’s address:
ssh root@your_server_ipPress Enter, and when prompted, enter the password.
That’s it! You’re now connected to the server via SSH.
Need help?
If you can’t log in or run into any issues, contact us through the client panel or support. We’re here to help!


